- 首页
- 正文
极简的端到端 Scrapy 教程(第一部分)【翻译】
网页爬取是数据科学家的一项重要技能。在过去的多年里,我使用过python,BeautifulSoup,和Scrapy开发了大量的web爬取项目,与此同时也阅读了一些书籍和大量的网上教程。但是,我还没有找到一个简单的入门教程,它是端到端的,涵盖了所有在爬取网页项目的基本步骤和概念(因此标题中是小型的)- 这就是我为什么要写这篇文章和希望这个代码仓库能够作为一个模板帮助到你的网页爬虫技术。
许多人会问:我应该使用 BeautifulSoup 还是 Scrapy?它们是不一样的东西:BeautifulSoup 是一个解释 HTML 和 XML 的库,而Scrapy 是一个网页爬虫框架。如果你想的话,你可以使用 BeautifulSoup 来代替 Scrapy 内置的选择器,但是用 BeautifulSoup 和 Scrapy 作比较就好像 Mac 键盘与iMac进行比较一样,如果你知道他们是什么的话,可以使用官方文档中所述的更好的比喻 “像 jinja2 跟 Django 作比较" - 简而言之,如果你想进行认真和系统地学习网页爬取技术,你就应该要学习 Scrapy。
这是我的代码:
在本系列教程中,我将介绍以下的步骤: 1.(本教程)从头开始一个 Scrapy 项目和开发一个简单的爬虫。重点之一是使用 Scrapy 的 Shell 来分析页面和调试,这个是你应该使用 Scrapy 而不使用 BeautifulSoup 的一个主要的原因之一。 2.(第二部分)介绍Item和ItemLoader并解释你为什么想使用它们(虽然一开始它们会使用你的代码看起来更复杂)。 3.(第三部分)使用 ORM(SQLAlchemy)并通过管道把数据存储到数据库,并展示如何建立最常见的一对多和多对多的关系。 4.(第四部分)部署项目到Scrapinghub (您必须支付服务费用,例如爬虫调度的服务)或者你可以使用强大的开源项目 ScrapydWeb 和 Heroku 来建立完全免费的服务器。 5.(第五部分)我创建了一个单独的仓库 (Scrapy + Selenium) 用来展示如何爬取动态网页(例如通过滚动来加载额外内容的页面)以及如何使用代理网络 (ProxyMesh) 来避开被禁止。
一些先决条件:
基本的 Python 知识(本教程用 Python3),虚拟环境,Homebrew 等等,请参阅我其它的文章如何设置虚拟环境:如何为 Mac 设置 Python 开发环境。
基本的 Git 和 Github 知识。我推荐 Pro Git book 这本书。
基本的数据库和 ORM 的知识,例如 结构化查询语言(SQL)简介。
让我们开始吧!
首先,创建一个新文件夹,在文件夹里建立 Python3 的虚拟环境,并安装 Scrapy。为了简化这一步,我创建了一个你可以 fork 和 克隆的 starter 仓库 (如果需要,请参阅 Python3 的虚拟环境文档)
$ git clone https://github.com/yourusername/scrapy-tutorial-starter.git
$ cd scrapy-tutorial-starter
$ python3.6 -m venv venv
$ source venv/bin/activate
$ pip install -r requirements.txt
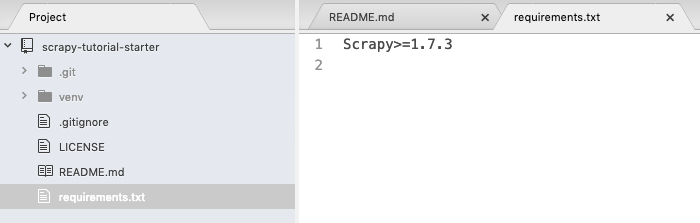
你的文件夹应该如下所示并且我假定我们在虚拟的p环境中工作。请注意,到目前为目,我们在 requirements.txt 只有一个包。
运行 scrapy startproject tutorial 来创建一个空的 scrapy 项目,你的文件夹如下所示:
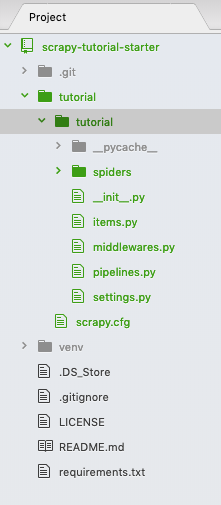
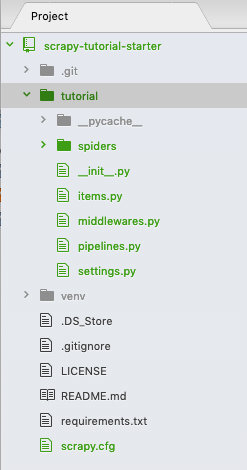
两个相同的 "tutorial" 文件夹被创建了。我们不需要第一层级的 "tutorial" 文件夹 - 删除它并且把第二层级的 "tutorial"文件夹和它的内容向上移动一级 - 我知道这很令人困惑,但这就是你对文件夹结构所做的一切。现在,你的文件夹应如下所示:
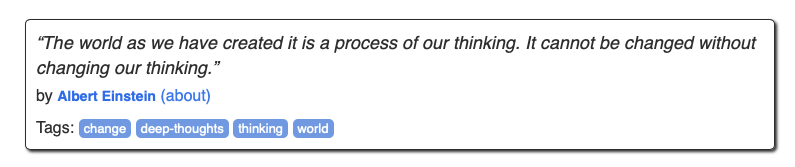
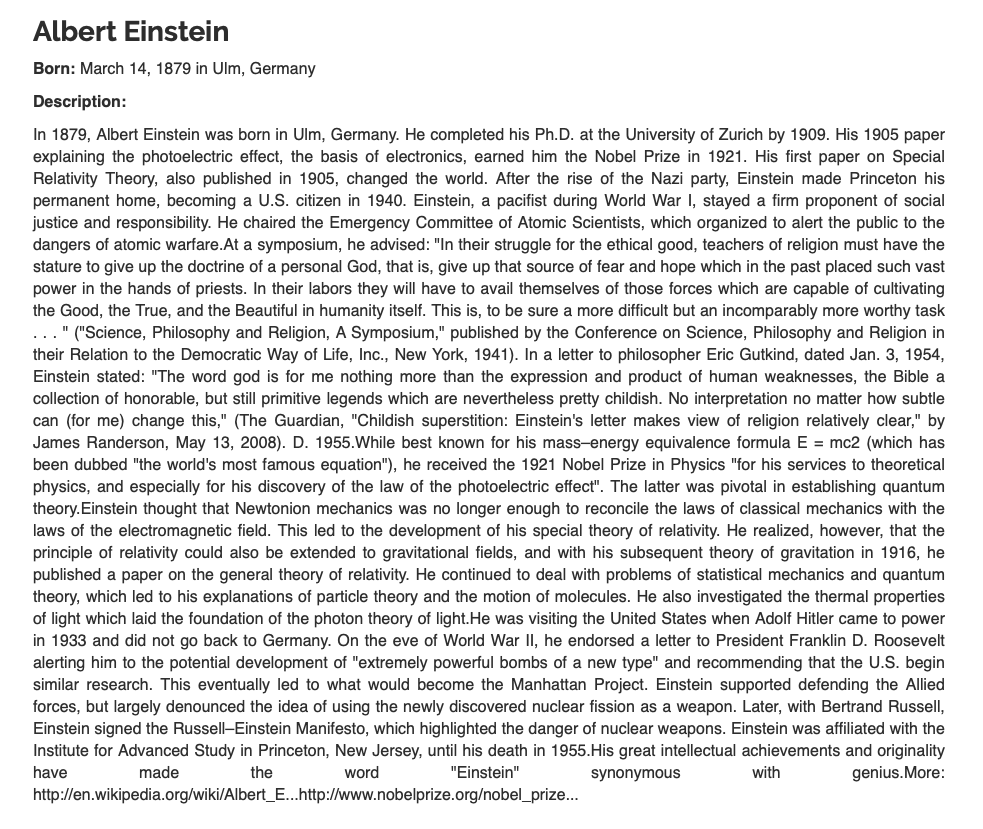
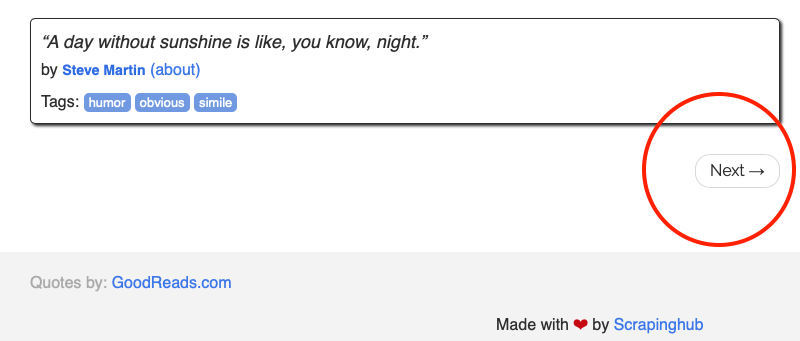
到目前为止,不用担心自动生成的文件,我们稍后会回到这些文件。本教程是基于官方的 Scrapy 教程。因此,我们将会爬取 http://quotes.toscrape.com 这个很简单的网页:有作者和标签引用的网页:
当你点击作者时,它将会去到包含了名字,生日,简历的作者详情页面。
现在,在 "spider" 文件夹里创建一个名为 "quotes-spider.py" 的新文件,内容如下:
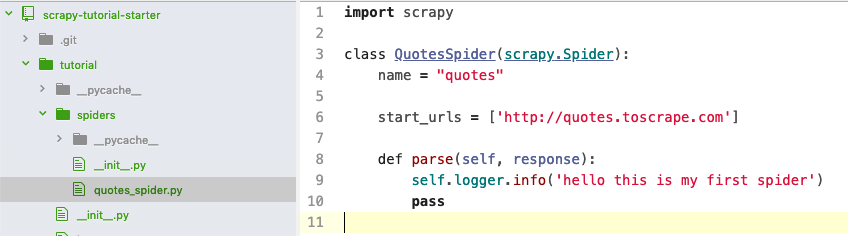
你刚刚创建了一个叫 "quotes" 的爬虫,它将请求发送到 http://quotes.toscrape.com 并从服务器中获得响j应。然而,到目前为止,当这个爬虫解释这个响应时它没有做任何事情,只是将字符串输出到控制台。让我们运行这个爬虫:scrapy crawl quotes,你应该看到如下输出:

下一步,让我们分析下这个响应,例如,使用 Scrapy Shell 并用下面的命令来解释 http://quotes.toscrape.com 的网页:
$ scrapy shell http://quotes.toscrape.com/
...
2019-08-21 20:10:40 [scrapy.core.engine] INFO: Spider opened
2019-08-21 20:10:41 [scrapy.core.engine] DEBUG: Crawled (404) <GET http://quotes.toscrape.com/robots.txt> (referer: None)
2019-08-21 20:10:41 [scrapy.core.engine] DEBUG: Crawled (200) <GET http://quotes.toscrape.com/> (referer: None)
[s] Available Scrapy objects:
[s]   scrapy     scrapy module (contains scrapy.Request, scrapy.Selector, etc)
[s]   crawler    <scrapy.crawler.Crawler object at 0x105d01dd8>
[s]   item       {}
[s]   request    <GET http://quotes.toscrape.com/>
[s]   response   <200 http://quotes.toscrape.com/>
[s]   settings   <scrapy.settings.Settings object at 0x106ae34e0>
[s]   spider     <DefaultSpider 'default' at 0x106f13780>
[s] Useful shortcuts:
[s]   fetch(url[, redirect=True]) Fetch URL and update local objects (by default, redirects are followed)
[s]   fetch(req)                  Fetch a scrapy.Request and update local objects
[s]   shelp()           Shell help (print this help)
[s]   view(response)    View response in a browser
>>>
你可以使用 Xpath 选择器或者 CSS 选择器来选择元素和Chrome 的开发者工具经常被用来分析页面(我们不会涵盖选择器的细节,请阅读相关的文档并学习怎么样使用它们):
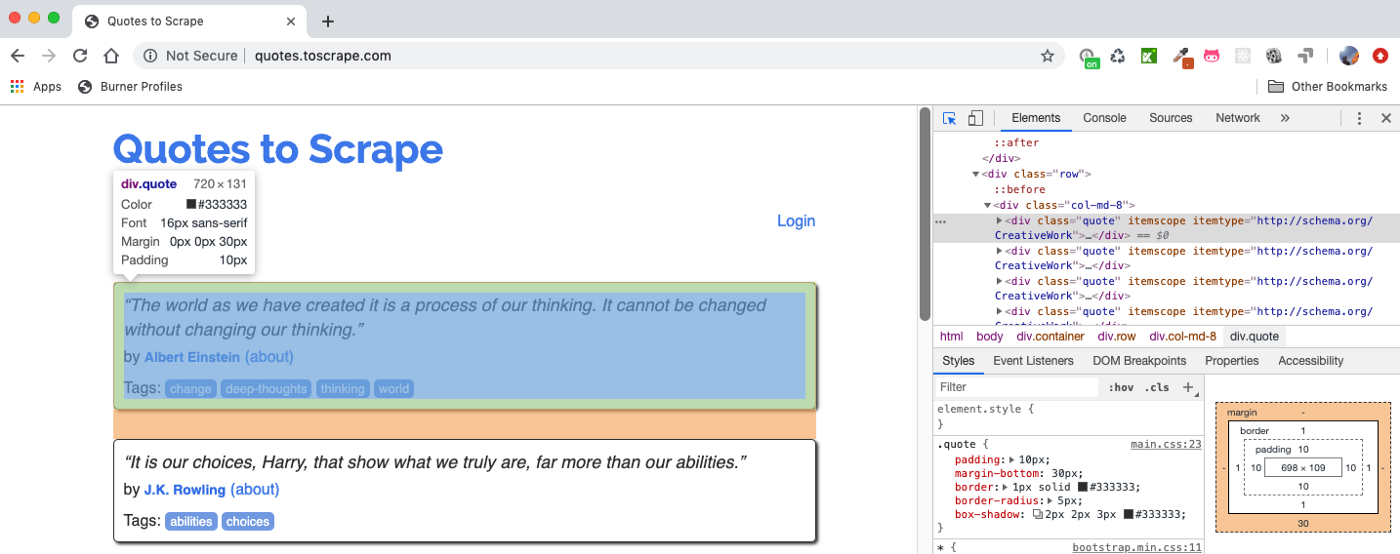
例如,你能测试这些选择器和在 Scrapy Shell 查看结果 - 假如我们想得到上面所示的引用块:
你能使用 Xpath 的 response.xpath(“//div[@class=’quote’]”).get()(.get() 显示的是第一个选择的元素,使用 .getall() 展示所有的元素)或者使用 CSSresponse.css(“div .quote”).get()。我加粗了我们想从引用块里的引用的文本,作者,和标签:
>>> response.xpath("//div[@class='quote']").get()
'<div class="quote" itemscope itemtype="http://schema.org/CreativeWork">\n        <span class="text" itemprop="text">“The world as we have created it is a process of our thinking. It cannot be changed without changing our thinking.”</span>\n        <span>by <small class="author" itemprop="author">Albert Einstein</small>\n        <a href="/author/Albert-Einstein">(about)</a>\n        </span>\n        <div class="tags">\n            Tags:\n            <meta class="keywords" itemprop="keywords" content="change,deep-thoughts,thinking,world"> \n            \n            <a class="tag" href="/tag/change/page/1/">change</a>\n            \n            <a class="tag" href="/tag/deep-thoughts/page/1/">deep-thoughts</a>\n            \n            <a class="tag" href="/tag/thinking/page/1/">thinking</a>\n            \n            <a class="tag" href="/tag/world/page/1/">world</a>\n            \n        </div>\n    </div>'
我们可以在 shell 里获得如下的数据:
- 获取 “quotes" 里所有的引用块
- 在 "quotes" 使用第一个引用:quotes[0]
- 尝试 css 选择器
>>> quotes = response.xpath("//div[@class='quote']")
>>> quotes[0].css(".text::text").getall()
['“The world as we have created it is a process of our thinking. It cannot be changed without changing our thinking.”']
>>> quotes[0].css(".author::text").getall()
['Albert Einstein']
>>> quotes[0].css(".tag::text").getall()
['change', 'deep-thoughts', 'thinking', 'world']
似乎上面显示的选择器得到了我们想要的。注意,我混合使用了 Xpath 和 CSS 选择器用于演示的目的 - 本教程不需要同时使用两种选择器。
现在,让我们修改爬虫文件和使用关键字 yield 把选择的数据输出到控制台(注意,每个页面都有很多的引用,我们需要使用循环来遍历它们):
import scrapy
class QuotesSpider(scrapy.Spider):
    name = "quotes"
start_urls = ['http://quotes.toscrape.com']
def parse(self, response):
        self.logger.info('hello this is my first spider')
        quotes = response.css('div.quote')
        for quote in quotes:
            yield {
                'text': quote.css('.text::text').get(),
                'author': quote.css('.author::text').get(),
                'tags': quote.css('.tag::text').getall(),
            }
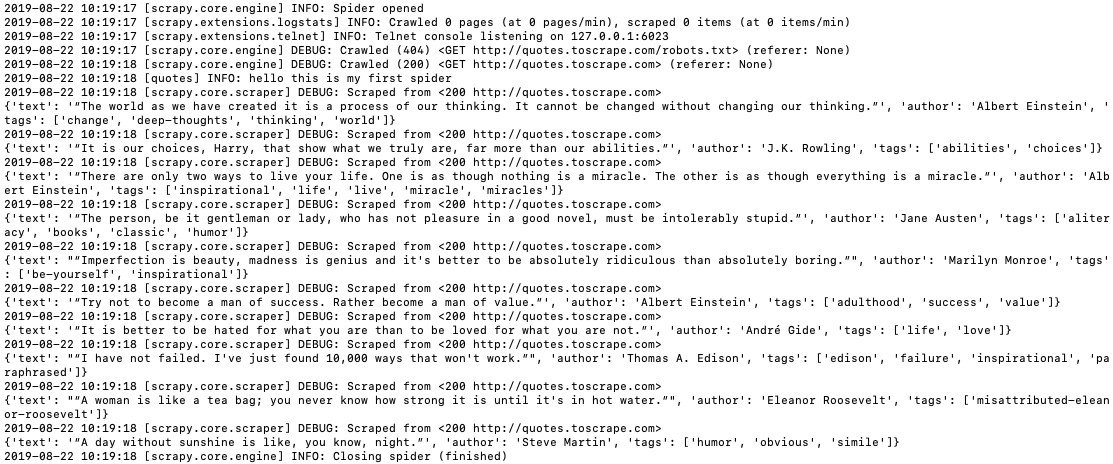
再次运行爬虫:scrapy crawl quotes,你就能在日志里看到提取的数据:
你可以运行这个命令用 JSON 文件来保存数据:scrapy crawl quotes -o quotes.json
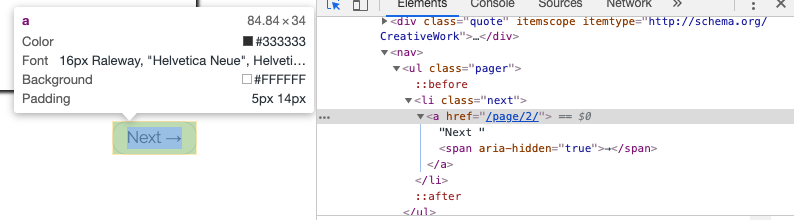
到目前为止,我们从第一个页面获取了所有的引用信息,下一个任务是爬取所有的页面。你应该注意到首页的底部一个 "下一步" 的按钮作为页面的导航 - 逻辑是:点击下一步按钮会去到下一页,获取引用,再次点击下一步,直到最后一页都没有下一步的按钮。
通过谷歌的开发者工具,我们能够获取到下一页的地址:
让我们再次在 Scrapy Shell 里执行 scrapy shell http://quotes.toscrape.com/:
$ scrapy shell http://quotes.toscrape.com/
...
>>> response.css('li.next a::attr(href)').get()
'/page/2/'
现在我们能够写出以下的爬虫代码,它能够遍历所有页面获取所有的引用:
import scrapy

class QuotesSpider(scrapy.Spider):
    name = "quotes"

    start_urls = ['http://quotes.toscrape.com']

    def parse(self, response):
        self.logger.info('hello this is my first spider')
        quotes = response.css('div.quote')
        for quote in quotes:
            yield {
                'text': quote.css('.text::text').get(),
                'author': quote.css('.author::text').get(),
                'tags': quote.css('.tag::text').getall(),
            }

        next_page = response.css('li.next a::attr(href)').get()

        if next_page is not None:
            next_page = response.urljoin(next_page)
            yield scrapy.Request(next_page, callback=self.parse)
使用 next_page = response.urljoin(next_page) 获取完整的地址和使用 yield scrapy.Request(next_page, callback=self.parse) 发送一个请求获取下一页,并使用回调函数调用同一个解释函数来获取新页面的引用。
快捷方式可用于简化上述的代码:请参阅本节。本质上,response.follow 提供相对的 url 地址(不需要调用 urljoin)和 自动使用 href 的 a 属性。因此,代码能被进一步简化为:
for a in response.css('li.next a'):
            yield response.follow(a, callback=self.parse)
现在,再次运行爬虫 scrapy crawl quotes,你应该能从提取的10页里看到引用。坚持住 - 我们几乎完成了第一部分。下一任务是爬取单个作者的页面。
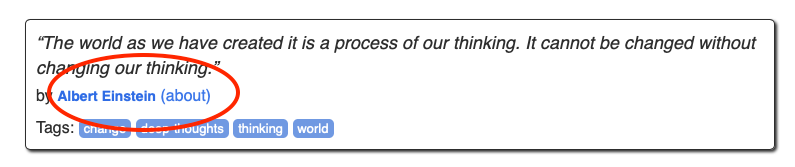
如上所示,当我们处理每个引用,我们可以通过以下突出的链接去到单个作者的页面 - 让我们使用 Scrapy Shell 来获得这个链接:
$ scrapy shell http://quotes.toscrape.com/
...
>>> response.css('.author + a::attr(href)').get()
'/author/Albert-Einstein'
因此,当我们循环提取每个引用的时候,我们发出另外一个请求转到相应的作者页面,并创建另外一个 parse_author 函数来提取作者的姓名,生日,出生地点还有个人简历并输出到控制台。更新的爬虫看起来如下:
import scrapy

class QuotesSpider(scrapy.Spider):
    name = "quotes"

    start_urls = ['http://quotes.toscrape.com']

    def parse(self, response):
        # self.logger.info('hello this is my first spider')
        quotes = response.css('div.quote')
        for quote in quotes:

            yield {
                'text': quote.css('.text::text').get(),
                'author': quote.css('.author::text').get(),
                'tags': quote.css('.tag::text').getall(),
            }

            author_url = quote.css('.author + a::attr(href)').get()
            self.logger.info('get author page url')
            # go to the author page
            yield response.follow(author_url, callback=self.parse_author)

        for a in response.css('li.next a'):
            yield response.follow(a, callback=self.parse)


    def parse_author(self, response):
        yield {
            'author_name': response.css('.author-title::text').get(),
            'author_birthday': response.css('.author-born-date::text').get(),
            'author_bornlocation': response.css('.author-born-location::text').get(),
            'author_bio': response.css('.author-description::text').get(),
        }
再次运行爬虫 scrapy crawl quotes,并仔细检查你需要提取的东西是否正确地输出到控制台。注意,Scrapy 是基于 Twisted 的,这是一种流行的 Python 事件驱动的网络框架,它是异步的。这意味着单个作者的页面可能无法与相应的引用同步处理。例如,作者页面结果的顺序可能与页面上的报价顺序不匹配。我们将在后面的部分讨论如何将报价与其相应的作者页面链接。
恭喜你,你已经完成了本教程的第一部分了。
在第二部分中了解更多的 Item 和 ItemLoader。
参考链接
【上一篇】Flutter的安装和配置